

What Exactly Is a Budget-Friendly eSIM and How Does It Save You Money?
Find the World’s Cheapest eSIM Plans: Save Big on Data Without the Roaming Fees
A cheap eSIM can cut your roaming costs by up to 90% compared to traditional carrier plans, and it activates in under two minutes. You simply scan a QR code from a budget provider, and your phone instantly connects to a local network at a fraction of the price. No physical SIM card, no waiting in line at airport kiosks—just instant, low-cost data wherever you land. For any traveler who refuses to overpay, switching to a cheap eSIM is the single easiest way to keep your money in your pocket.
What Exactly Is a Budget-Friendly eSIM and How Does It Save You Money?
A budget-friendly eSIM is a digital SIM profile purchased at a steep discount compared to standard roaming plans, often sourced from regional carriers or data-only aggregators. It’s not a separate physical card but a downloadable network profile that activates instantly via QR code. A cheap eSIM saves you money by bypassing your home carrier’s per-megabyte roaming fees entirely, instead locking in a flat, prepaid rate for a set data allowance—usually costing 70–90% less than traditional roaming. You pay only for what you need, whether that’s 1GB for a weekend or 10GB for a month, and you avoid surprise post-trip bills. Because these eSIMs connect to local towers in your destination, you get reliable speeds without the markup.
The key insight: a cheap eSIM turns international connectivity from a metered luxury into a fixed, budgetable utility—the price is the price, no hidden extras.
You simply compare data packages, pick the cheapest per-GB option, and install it before you fly.
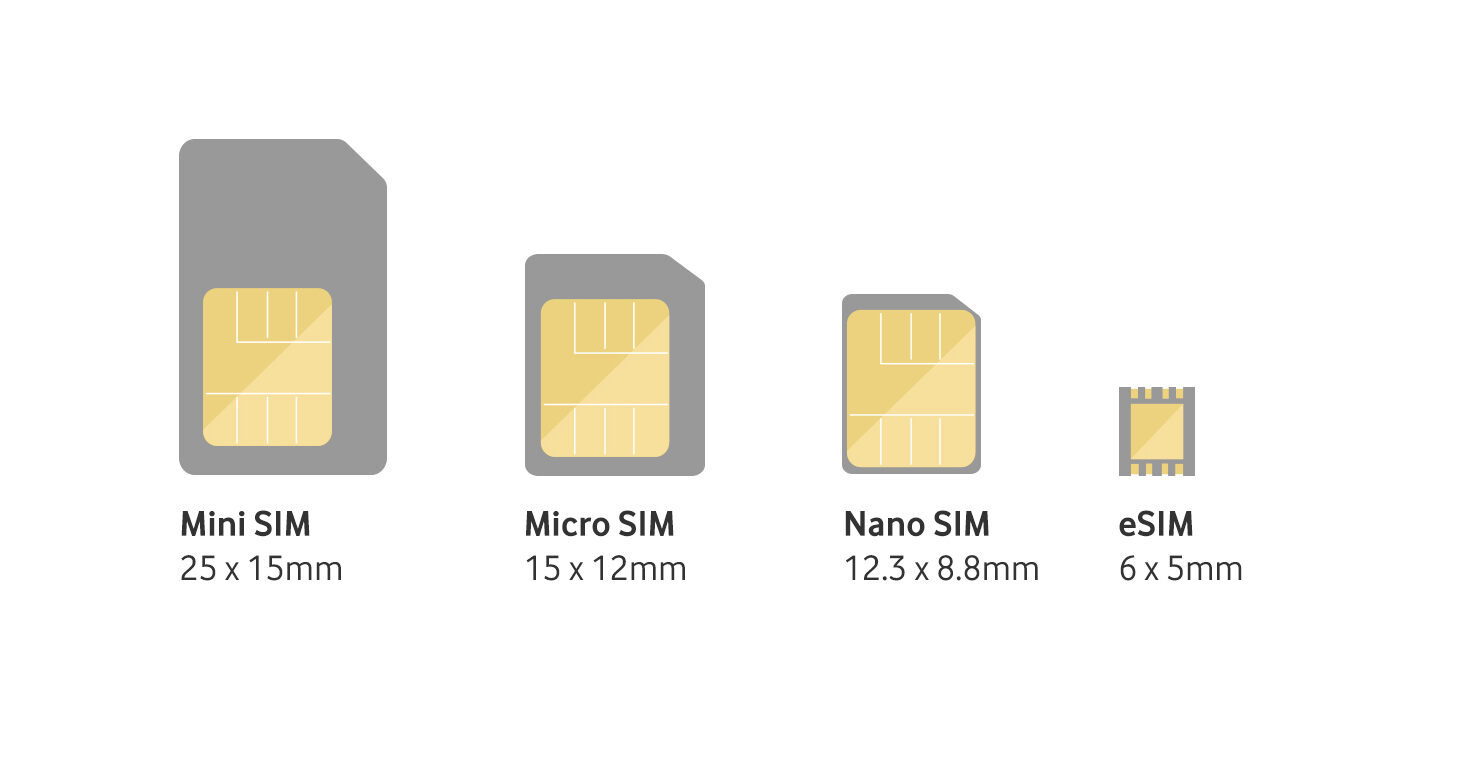
Breaking Down the Difference Between a Physical SIM and an eSIM
A physical SIM is a plastic card you swap between phones, while an eSIM is a tiny chip soldered inside your device that you activate digitally. With a physical SIM, you’re locked to whichever carrier’s card you insert, often paying retail prices for local data. An eSIM lets you download a budget-friendly eSIM profile instantly, comparing plans from multiple providers without waiting for delivery or fiddling with tiny trays. For travelers, this means landing and scanning a QR code to get a cheap data package, then switching to another if signal fails—no physical swap needed. You can store several eSIMs on one phone, but only one active at a time, unlike physical SIMs where you carry multiple cards. Q: Is switching from physical SIM to eSIM complicated? A: No—most phones guide you through it in under two minutes, and you keep your old SIM active until the eSIM is verified.
Why Digital SIMs Cost Less Than Traditional Roaming Plans
Traditional roaming ties your rate to your home carrier’s wholesale agreements, which bundle per-megabyte costs with markup and daily fees. Digital SIMs skip that chain entirely, letting you buy a data package directly from a local network in your destination at that country’s domestic pricing. You also pay only for the data you need—a 5-day, 3GB plan—instead of a flat daily roaming charge that bills even for idle background sync. Because the eSIM profile is delivered over the internet, there are no physical SIM shipping costs or retail commissions inflating the price. This direct-to-network model is precisely why a budget-friendly eSIM delivers lower data costs without sacrificing coverage.
How Data-Only eSIMs Slash Your Travel Phone Bill
Ditching your regular SIM for a data-only eSIM is the fastest way to slash your travel phone bill because you stop paying for voice minutes and texts you rarely use. Instead, you buy a cheap data package that covers your actual needs: maps, translation, and messaging apps. Data-only eSIMs cut travel costs by removing roaming charges for calls you never make, letting you snag local data rates without buying a local physical SIM. Plus, you can compare prices from multiple providers and install a budget plan before you even board the plane, avoiding airport kiosk markups entirely.
Q: How does a data-only eSIM lower my phone bill so drastically?
A: You simply stop funding the expensive voice-and-text portions of your plan. A data-only eSIM turns your phone into a Wi-Fi-only device for calls (via apps like WhatsApp), while giving you the flexibility to pick a tiny 1GB plan for a weekend trip, costing just a few dollars instead of the usual daily roaming fee.
Where Can You Find the Lowest-Priced eSIM Plans Without Sacrificing Speed?
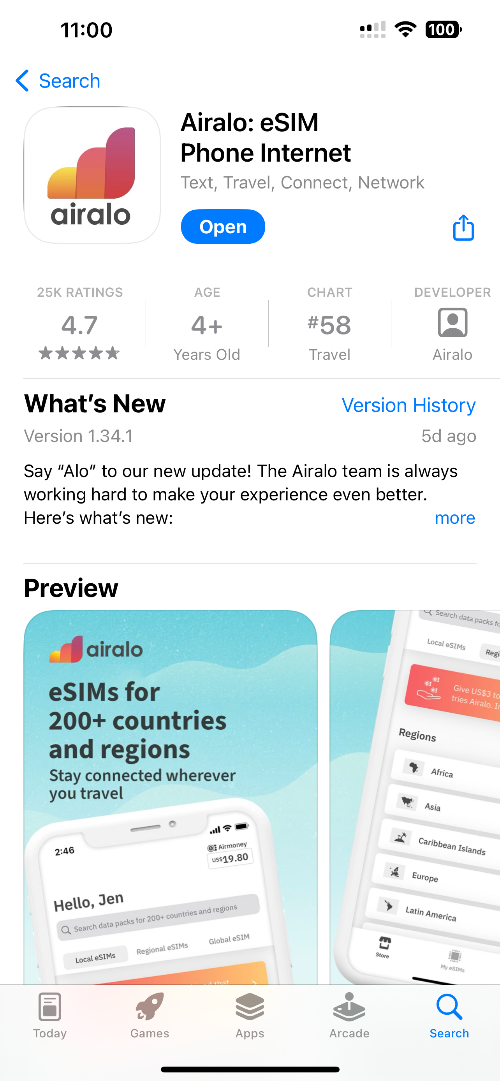
The lowest-priced eSIM plans that keep speed intact are rarely on mega-brands—instead, hunt on regional aggregators like esimdb or Airalo’s “discover” mode, where local carriers (e.g., Vietnam’s Vinaphone or Spain’s Digi) list data-only packages for under $2 per 1GB. For unbeatable deals, buy directly from the country’s native provider app (like Globe’s eSIM in the Philippines), bypassing markup, and always check the network’s “LTE/5G” badge before purchase—some budget plans throttle to 3G speeds after 500MB. Prioritize plans with explicit “full-speed” or “no throttle” clauses, even if they cost $0.50 more; the difference is brutal for video calls. Sachet-style “1-day” eSIMs often undercut monthly bundles per gigabyte, but only if you’re a light user. Stick to names like Jetpac, Maya Mobile, or local MVNOs linked on TripAdvisor forums, and read recent reviews for real-world speed—price alone never predicts performance.
Top Regional Providers in Europe, Asia, and the Americas for Rock-Bottom Rates
For rock-bottom rates, skip global giants and target regional specialists. In Europe, Airalo’s regional packs for the Balkans or Baltics undercut single-country plans, while eSIM Plus offers aggressive per-GB pricing across Western Europe. Across Asia, Nomad’s Southeast Asia bundle and Jetpac’s Japan-Korea combo consistently beat mainstream rivals on price-per-gigabyte. In the Americas, Holafly’s Latin America plan and AloSIM’s Canada-Mexico coverage deliver the lowest effective costs for multi-country trips. Regional providers in Europe, Asia, and the Americas deliver rock-bottom rates by negotiating local wholesale access, not global roaming. Always check coverage maps for rural dead zones—price savings mean nothing if you lose signal mid-route.
Stick to regional carriers like Airalo, Nomad, and Holafly across Europe, Asia, and the Americas to lock in the cheapest eSIM rates without sacrificing usable speed.
Comparing Pay-As-You-Go vs. Short-Term Data Packs for Thrifty Travelers
For thrifty travelers, choosing between pay-as-you-go and short-term data packs hinges on consumption predictability. Pay-as-you-go eSIMs, often at $1–$3 per GB, suit those with sporadic, low-data needs, letting you stretch a small credit across weeks. Conversely, short-term packs, like 5GB for 30 days, offer a lower per-GB rate but risk waste if you underuse them. Calculate your average daily usage first: under 200MB daily, top up as needed; over 500MB, lock in a fixed pack to avoid per-MB overage. Crucially, verify the pack’s validity window against your trip length—a 7-day pack on a 10-day stay forces a costly reload. Data-waste protection is the deciding factor: pay-as-you-go never expires unused allowance (unless defined), while fixed packs punish miscalculation. Prioritize plans with rollover or refund options.
How to Spot Hidden Fees and Fair-Usage Policies in Discounted Plans
Before you grab that cheap eSIM, dig into the fine print to avoid nasty surprises. Fair-usage policies often hide behind “unlimited” data, so check the exact cap for high-speed usage—many plans throttle you after 1–3 GB. Look for setup fees, top-up minimums, or activation charges that inflate the advertised price. Read the “terms” section for daily connection fees, which can drain balance even when you’re offline. Verify if local calls or SMS cost extra, and whether tethering is blocked. Finally, test support responsiveness with a pre-sale question—a slow reply hints at post-purchase headaches. Always compare the effective cost per GB after all add-ons. Scan reviews for “bill shock” mentions to confirm what’s really included.
Step-by-Step Setup Guide: Activating a Low-Cost Digital SIM in Minutes
You’ve just landed, your phone is locked to roaming charges, and you’re staring at a pixelated map. That’s when you remember the cheap eSIM you bought online. The step-by-step setup guide is already on your screen: first, scan the QR code emailed to you, then tap “Add Cellular Plan.” Within seconds, your phone recognizes the data package. No plastic tray, no store visit—just a digital profile breathing life into your device. You pick a local carrier from the list, confirm the activation, and toggle the line on. By the time you’ve grabbed your bag from the carousel, the “LTE” icon glows. Your travel SIM is ready, and you’ve spent less than the cost of a coffee.
Checking Phone Compatibility Before You Buy a Value Data Plan
Before committing to a value data plan, verify your handset supports eSIM—most devices released after 2020 do, but budget models may not. Check your IMEI by dialing *#06#; if an EID number appears, your phone is eSIM-ready. Then, confirm your device is carrier-unlocked for international eSIM profiles, as some regional phones restrict remote provisioning. Also, ensure the phone’s firmware allows adding multiple eSIMs, since switching between a home and travel plan often requires a slot. Even a flagship phone can fail to activate if its eSIM software is region-locked, so test with a free trial profile first. Finally, verify that your model supports the network bands used by the budget plan’s roaming partners—otherwise, data speeds may collapse to 3G.
Scanning the QR Code and Installing the Profile on iPhone and Android
After checkout, your cheap eSIM provider emails a QR code—scan it directly from that screen or a printed copy. On iPhone, go to **Settings > Cellular > Add eSIM**, then point the camera at the code; tap “Add” when the plan pops up. Android users head to Settings > Network & Internet > SIMs > Add SIM, then “Download a SIM instead” and scan. *If the QR fails, manually enter the SM-DP+ address and activation code from the email instead.* Both phones install the profile in under a minute, though iOS may ask you to label it (e.g., “Travel”) before activating—Android usually activates instantly, but double-check the new SIM’s status in the same menu.
Switching Between eSIM and Your Home SIM to Avoid Extra Charges
To dodge surprise fees, treat your home SIM as the default while traveling, but toggle your eSIM on only when you need data. On iPhone, go to Cellular > Cellular Plans and set your home line to “Off” for roaming; on Android, disable “Mobile Data” for the physical SIM. Before departure, disable background app refresh on both lines and always keep your home SIM active for SMS verification. This dual-SIM management strategy stops accidental carrier switching, which triggers daily roaming charges. Many budget travelers also set the eSIM as “Primary Data” while keeping the home SIM for calls, ensuring charge-free connectivity without ripping out your physical card.
Q: Can I switch eSIM and home SIM mid-trip to avoid extra charges?
A: Yes, but only toggle data between them when you’re in a Wi-Fi zone. Switching offline mid-usage can incur a per-MB fee from your home carrier, so change the data source before you need it, not after.
Smart Tips to Squeeze Every Megabyte Out of an Affordable Data Package
Maximizing a cheap eSIM data plan starts with ruthless app management—disable background refresh for social media and email, which silently drains megabytes. Before traveling, download offline maps for your destination, and force your phone to use Wi-Fi for large updates and photo backups. In your eSIM settings, switch to 3G or LTE instead of 5G when speeds aren’t critical, as this can stretch a budget package significantly. A clever trick: use a browser like Opera Mini or enable data-saver mode in Chrome to compress pages. Also, set WhatsApp to download media only on Wi-Fi, and stream videos in 480p, not HD. These tiny adjustments ensure every megabyte counts when you’re relying on a low-cost eSIM, so you avoid topping up before your trip ends.
Using Offline Maps and Messaging Apps to Cut Data Consumption
Your cheap eSIM plan works harder when you let apps work offline. Before you head out, download the city map in Google Maps or Maps.me—you can navigate, search, and pin spots without using data. For messaging, switch to apps like WhatsApp or Telegram, where you can set media downloads to “Wi-Fi only” and use their lightweight text-only mode. This stops photos and videos from silently eating your megabytes while you chat. Even better, use messaging apps’ built-in location sharing instead of a full map—it sends a tiny pin, not a data-hungry route. Pair these habits with your eSIM’s flexible top-ups, and you’ll stretch every byte much further.
Setting Up Auto-Connect to the Cheapest Local Network Towers
To make every megabyte of your cheap eSIM count, start by forcing your phone to scan for local towers manually after landing. In your network settings, toggle off “automatic” selection, then watch the list refresh—your device will often pick https://baztel.co/ the strongest signal, but that’s not always the cheapest. Pick the least congested operator with a strong bar, and save that selection. Then, enable Wi-Fi calling over cellular as a backup, which routes calls through data when you’re near a router. This prevents your eSIM from burning through data on weak tower handoffs. For repeated trips, your phone remembers preferred networks, so it auto-connects to that budget tower instantly, skipping pricier roaming partners. Network prioritization turns your affordable plan into a precision tool.
Manually select and lock your eSIM to the cheapest local tower once; your phone will auto-connect to it on future visits, slashing data waste from roaming handoffs.
How to Top Up or Extend Your Plan When the Data Runs Out
When your cheap eSIM data exhausts, act immediately through the provider’s app or website—most budget carriers process top-ups in under a minute. Look for **emergency data add-ons** priced per gigabyte, which cost less than letting your plan lapse into pay-as-you-go rates. Alternatively, extend your existing cycle by purchasing a “data-only renewal” that resets the validity period without changing your base package. Some cheap eSIMs let you stack multiple small top-ups to bridge a few days before your next monthly reset. Always confirm your new expiry date on the confirmation screen, then toggle airplane mode off to refresh network registration and resume browsing without a hitch.
Common Pitfalls and Fixes: What New Users Get Wrong with Discounted eSIMs
New users often grab the cheapest eSIM without checking if it actually covers their destination’s local networks, then hit a wall of no service at the airport—the classic **discounted eSIM mistake**. They assume “regional” means everywhere, but cheap plans frequently lock you to one carrier with weak rural coverage. The fix is reading the fine print for network partners before buying. Another trap: they install the eSIM while still in their home country, burning the activation timer immediately. Instead, wait until you land, or the cheap data expires before your trip ends. Finally, many forget to toggle off their physical SIM’s roaming, so the discounted eSIM never activates—check your APN settings and data switching first. Test a small data packet before relying on the full plan.
Why Your Phone Shows “No Service” After Installation and How to Resolve It
After installing a discounted eSIM, “No Service” usually means your phone locked onto the wrong network profile or the APN settings didn’t auto-configure. First, toggle airplane mode for 30 seconds—this forces a fresh tower search. If that fails, manually select your carrier under *Settings > Cellular > Network Selection*, turning off “Automatic.” For Android, double-check that the eSIM is set as the **default data line**, not just a secondary SIM. Also, ensure your phone isn’t carrier-locked, as cheap eSIMs often require an unlocked device. Lastly, delete and re-download the eSIM profile, then restart—this clears corrupted installation data that causes the persistent “No Service” glitch.
No Service after eSIM install? Fix it by toggling airplane mode, manually selecting your carrier, setting the eSIM as default, and reinstalling the profile if needed.
Understanding Whether the Plan Covers Hotspots, Tethering, or Voice Calls
New users often assume a cheap eSIM covers all data usage identically, but hotspot and tethering restrictions are a primary trap. Many budget plans explicitly throttle or block tethering, rendering your laptop useless even when your phone shows a signal. Likewise, voice calls are typically a separate, per-minute product on data-only eSIMs, and attempting a standard call can drain credit without connection. To avoid surprise charges, verify the plan’s fine print for “hotspot allowance” and whether any voice minutes are bundled or require a VoIP app. Crucially, tethering and calling are not automatic with cheap eSIM data; always isolate these features in the carrier’s terms before purchase, as testing them post-activation costs time and money.
What to Do If Your Activation Code Expires Before You Land
If your activation code expires before you land, don’t panic—this happens more often with cheap eSIMs because their install windows are short. First, check your email for the original receipt, since most providers let you re-issue the same code once free. If that fails, log into your account on the provider’s site and look for a “resend QR code” button; some require you to bump your start date manually. Always activate the eSIM while still on Wi-Fi at home—even if you set it to activate later, the code’s timer often begins at installation, not arrival. As a last resort, buy a new $2–$5 plan from the same provider, and wait until you’re at the gate to install it. Quick sequence: 1) Contact support via live chat (faster than email). 2) Ask for a one-time code extension. 3) If denied, repurchase the same plan. 4) Install immediately on airport Wi-Fi.